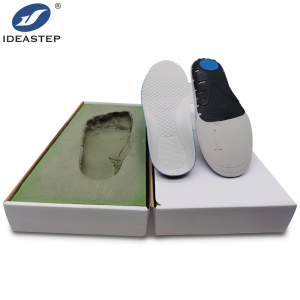
To use foot impression boxes to customize insoles, follow these steps:
1. Prepare the foot impression box
Ensure that the foot impression box is clean and free from any debris or dirt. Make sure you have the correct size box for your foot.
2. Prepare your foot
Wash and dry your feet thoroughly before making the impression. Remove any socks or footwear.
3. Place the foot in the impression box
Carefully place your foot into the foot impression box, ensuring that your heel is positioned at the back of the box and your toes are fully extended.
4. Apply pressure
Apply gentle pressure to your foot by standing or putting weight on it. This helps to create an accurate impression of your foot shape and arch.
5. Maintain the position
Keep your foot in the box for the recommended duration specified by the manufacturer. This usually ranges from 1 to 3 minutes. Avoid moving or shifting your foot during this time.
6. Remove your foot
Slowly and carefully remove your foot from the impression box, making sure not to distort the shape of the impression.
7. Let the impression dry
Allow the foot impression to dry completely before sending it to the manufacturer or using it to customize your insoles. Follow the manufacturer’s instructions for drying time.
8. Send the impression or use it for customization
If you are working with a podiatrist or a professional insole manufacturer, you can send the foot impression to them for customization. Alternatively, if you have a DIY insole kit, you can use the foot impression to mold and shape your own insoles according to the provided instructions.
Remember, if you are unsure about the process or want the best results, it is recommended to consult with a healthcare professional or a podiatrist who specializes in foot orthotics. They can guide you through the process and ensure that the insoles are customized correctly for your specific foot needs.
Expand more related content: https://www.aideastep.com/custom-orthotic/.
